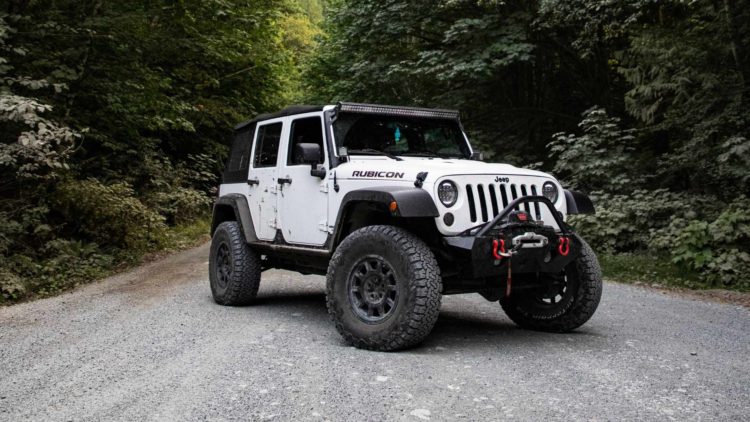
A lift kit replaces the shocks and springs on your vehicle. This investment increases the ride height, allowing you to hit all four corners or focus only on the front.
If you lift the front, you’ll avoid the sloped look that affects most trucks and SUVs. Although this work can change the vehicle’s aerodynamic profile, it also tends to look more aesthetically pleasing.
Lifting a truck or SUV can also make it more capable in off-road situations. If you go with three inches, you’ll have better clearance for the obstacles that get in your path.
When you drop to a 2.5-inch lift, you’ll have more highway stability without sacrificing much height to keep the center of gravity more usable.
About to Lift – 2.5” vs. 3”
When you lift your truck, SUV, or Jeep, the maximum amount is typically three inches when you use the factory specs. If you replace additional equipment, you can sometimes go higher. Instead of hitting the maximum restriction to the letter, many owners choose a lift kit at 2.5 inches for more flexibility.
If you love to do some serious off-roading, lifting your truck, SUV, or Jeep can improve suspension travel and ground clearance. This investment also lets you fit a larger tire size to support the vehicle, allowing you to use something better suited for going off the beaten path.
A 2.5-inch or a 3-inch lift also makes your vehicle look better.
Everyone has different reasons for installing a lift kit. Your choices for taking this step will dictate the type that gets installed.
Most drivers want a combination vehicle that can handle everything. They want a daily driver, something for camping, a toy for off-road trails, and something to tow a boat or fifth wheel. If that sounds like something you’d want, a suspension lift kit is the better choice.
A suspension lift kit handles multiuse situations where the goal is to balance drivability and flexibility.
The suspension is only part of the overall equation when you’re about to lift the vehicle. You’ll need to address the tires, wheels, and drivetrain to ensure all three systems work together cohesively. If one of them is even slightly off, the cost could be traction loss at the worst possible moment.
Are you thinking about a lift today? If so, here are the questions you should ask.
- How much will I use the vehicle after it gets lifted?
- What tire type and size do I want to use?
- How much is my budget for lifting my truck, SUV, or Jeep?
What to Consider Before Installing a Lift
Unless you are an experienced mechanic, it is usually better to have a professional install a lift kit or suspension modification. This work can create a lot of unintentional damage to your vehicle when it isn’t done correctly.
If you lift the vehicle inappropriately, you’d be on the hook for the damage. When a mechanic makes these mistakes, you can file a claim for repairs, compensation, or litigation against the company’s insurance to cover those costs.
A more significant lift typically requires longer shocks and lower control arms to complete. You’ll need to add strength and lengthen your brake lines for the front and back. Anything at 3.5 inches requires these modifications.
When your lift is four inches or more, you’ll need to install a more extended upper control arm. This mod also needs a track bar replacement and a longer emergency brake line.
That’s why a 3-inch lift is thought of as the maximum option for trucks, SUVs, and Jeeps today. You’ll maximize the height while reducing the additional changes that can add high costs to the vehicle modifications.
A two-door kit is also different from a four-door one because of the spring rates.
Pros and Cons of a Short Arm Lift
Suspension lifts tend to be the most popular for vehicles today because they’re effective immediately and come at a mid-level price. Although you can technically go up to six inches with this option on some trucks and SUVs, most owners stick with a 2.5-inch or a 3-inch lift because it minimizes the additional mods that need to get made.
On a Jeep, the 2.5-inch lift drops the need for a slip yok eliminator and CV driveshaft to prevent vibrational problems.
Although every lift kit is different, you’ll typically need sway bar links, new shocks, and bigger coil springs to complete the upgrade.
Before you get started with this work, here is a closer look at the pros and cons of lifting your vehicle three inches or less.
| What Are the Pros of a Vehicle Lift? | What Are the Cons of a Vehicle Lift? |
| • Drivers gain access to greater suspension travel, helping the vehicle maintain a stable center of gravity in a variety of conditions. • You’ll experience increased wheel travel and improved ground clearance. • It allows owners to equip their vehicles with larger tires for better traction and stability on the highway or during off-road conditions. • The installation process isn’t complex, which means most professional mechanics can get the job finished in a couple of hours. • This option doesn’t require mods to the shift linkage, allowing the vehicle to feel the same after the upgrade is finished. • The lift install is much easier to complete than one that requires a long arm lift when exceeding four inches or more. | • The lifting process still creates a higher center of gravity, which means the truck, SUV, or Jeep will feel a little loose at first after completing the upgrade. • It is more expensive to complete this work than to pursue a body lift that maintains the rest of the original structure. • Larger lifts sometimes require extended brake lines, even if you stick with the three-inch height limit. • Although rare at the 2.5-inch or 3-inch level, it is possible that driveline modifications might be necessary on smaller trucks or SUVs. • The ride quality can receive negative impacts once the work is complete, even if the entire process is finished flawlessly. • This job usually requires the help of a professional mechanic, even for experienced DIY’ers. |
How to Complete the Lift for Your Vehicle
Although every vehicle is unique and follows a specific set of processes for completing a lift, the following generic steps can help you achieve the desired outcome relatively quickly.
Before you get started, you’ll need to know if your vehicle has a torsion bar, coil spring, or leaf spring suspension. Once you’ve identified the design, the appropriate lift kit and new parts can get secured.
◼️ Steps to Follow When About to Lift – 2.5” or 3”
- Unclamp the negative battery terminal. Taking this step first will ensure that you don’t receive an accidental electric shock while working.
- Loosen the lug nuts on your vehicle, but do not remove them yet.
- Use a jack to increase the vehicle’s height to a level that is high enough for you to be underneath it without an issue while leaving room for the parts. You should have one under each weight point while keeping the vehicle level.
- Place safety stands under each side of the vehicle for extra support. Don’t rely on the jacks alone to keep your vehicle in the air. The stands should be rated for your vehicle’s weight.
- Use a floor jack underneath the axle to hold its weight as you remove the suspension components.
- You can now remove the wheels and tires from your vehicle.
- You’ll want to remove the following components next: the current shocks, U-bolts, and springs. These items should get set aside if they’re staying on your truck, SUV, or Jeep. If you have trouble getting them off, try hammering them away. When you have replacements to use, they can be cut off.
- Some lift kits require spring assembly work. If that is the case for your installation, you’ll want to follow the manufacturer’s instructions for a successful outcome. Bolt them into their appropriate place.
- Take the new U-bolts and attach them to where the old ones were. They should be vertical and aligned, referencing the previous installation.
- Assemble the shocks using your kit instructions. Once they’re finished, you can install them as instructed.
- Ensure that every bolt, nut, and new component from the lift kit is tightly attached. It often helps to use a torque wrench to ensure everything is on according to the automaker’s specs.
- Remove the safety stands, carefully lowering the vehicle while keeping it level.
If you are installing a lift kit for the rear suspension, you’ll want to follow these steps a second time.
It’s often easier to upgrade the rear because spacers or blocks near the leaf springs are enough to complete the work without creating additional problems.
How to Make Life Easier When About to Lift 2.5” vs. 3”
If you decide to lift your vehicle at home, investing in a high-quality pair of jack stands ensures that you can work safely. You can substitute one from your automaker with a generic set rated for the weight of your truck, SUV, or Jeep.
It isn’t always easy to find heavy-duty jack stands at your local automotive shop. Most of the products you’ll find have a rating of less than one ton.
Although some lighter cars could benefit from those jack stands, your truck, SUV, or Jeep is likely in the 1.5-ton range or higher. That means you’ll need to match the product’s specs to what is necessary for the full support of your vehicle.
When I need to work on my car, I prefer to use the 12-ton Omega Lift Heavy-Duty Jack Stands. This design comes with double locking pins and a handle lock to ensure you receive a stable experience.
The manufacturer uses a stamped steel design with a welded frame to deliver an impressive result. You’ll receive a lifting range from 19 5/8 inches to 29 7/8 inches, which is plenty of room to work on that lift kit.
I love how the ratchet par is made from cast iron, allowing it to work with the sawtooth design for quick height adjustments that lock securely.
With the double pin mechanism, you’ll have a large saddle surface that stays in contact with the load while you get to work on the lift.
If you want to improve the aesthetics and ride of your truck, SUV, or Jeep, it’s worth considering a lift of 2.5 inches or 3 inches. That amount minimizes the work you need to do while maximizing the achievable results.


