
Do you own a Chevy S-10 or Sonoma from the 1998 model year or earlier? If so, you need to know about the lug pattern for your truck.
Although these models are older, they still offer some unique benefits if you have one of the trucks at home.
That means you can modify them in ways that other truck manufacturers won’t allow.
This guide will take you through the lug pattern you need and what it takes to replace a tire that stops performing as expected.
What Lug Pattern Are 98+ S10/Sonomas?
The Chevy S10 uses the 5 x 4.75-inch bolt pattern. The lug nuts for this truck are frequently changed or treated to prevent corrosion and rust development. As time passes, the protective coatings wear out, making it challenging to remove them for tire changes. This pattern also applies to Sonomas.
What is unique about the lug pattern for the 1998 and later Chevy S-10 trucks and Sonomas is that it also works with the Corvette and Camaro. That means you can run a similar set of wheels to create some beautiful custom looks.
Although the BMW bolt pattern is similar, the difference is slightly off. This option is a 5 x 120, which is just a little different. You can still make it work, but you’ll notice some problems as time passes. That’s because the Chevrolet lugs are 0.7 millimeters wider than what the 5 x 120 delivers.
How to Change Tires on the 98+ S10/Sonomas
When you want to swap out your wheels, it makes sense to upgrade your look. Before you can take that step, it helps to know how to change a tire.
Tire changing is a necessary skill for every driver. Although a cell phone can help during a roadside emergency, what happens if your tire blows in a place without a signal?
There’s always a chance that you might forget to charge your cell or leave it at home. Since a flat tire can happen anywhere, it helps to know how to do this work.

The good news is that it isn’t hard to change a flat. That process starts by ensuring that you have a spare tool kit that works with your Chevy fitment.
You also need to have a jack that can help you lift the truck when it is time to pull the flat off the bolts.
Once you have the equipment, you can follow these steps to ensure that you can start working on fixing that flat.
1. Find a Safe Location
Once you know your truck has a flat tire, it might be tempting to brake suddenly or quickly turn to the shoulder. Those actions could cause an accident.
It works better to reduce your speed slowly. Signal that you have an emergency, look for a level stretch of road, and find a wide shoulder.

The best place to change a flat is typically an empty parking lot. When this problem happens on a highway, pull as far over as you can to get out of the traffic flow. Put on your emergency blinkers, run the warning triangles out, and get to work.
It’s better to replace a rim than to risk changing a flat tire in an unsafe area.
2. Use Emergency Indicators
If you don’t have warning triangles, it is still better to have your blinkers staged for double blinking. You can also use a battery kit with emergency lighting that can flash to indicate that you have trouble along the shoulder.
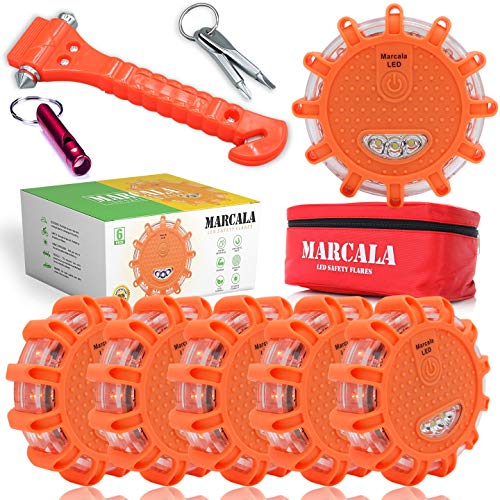
When neither option is available, it helps to invest in some roadside flares. You’ll want to get the emergency blinkers fixed as soon as possible.
3. Apply Your Parking Brake
Once your S-10 or Sonoma comes to a stop, apply the parking brake to stabilize the truck. If you rely on it being in Park alone, there is still the possibility that the vehicle could roll.
4. Insert Wheel Wedges
When you park your truck to fix a flat tire, it helps to have wedges that go behind or in front of the wheels. This step gives you additional insurance for preventing unwanted vehicle movement when changing a flat.
The wheel wedges should be placed based on where the flat occurs. When you have a rear to change, this product goes in front of the front tires.
If the flat occurs in the front, the wheel wedges go behind the rear tires.
5. Remove the Wheel Cover and Loosen the Lugs
Most vehicles come with a hubcap or a wheel cover that protects the lug nuts. If yours isn’t missing for your Chevy truck, you’ll want to remove this item to start the changing process. Don’t try to jack up the vehicle yet.
It helps to loosen the lugs first before it is in the air because you’ll get more resistance.
You’ll need the lug wrench from your S-10 or Sonoma to turn the lug nuts counterclockwise. It can take some pressure to break the resistance, especially if there is some rust or corrosion. If it takes all your body weight to get some movement, don’t be afraid to put in that force safely.
Once you get the resistance broken, turn the lug nuts about a half-turn. Don’t remove them entirely until you lift the vehicle.
6. Use the Jack to Lift the Truck
Your owner’s manual will indicate the best place for your jack. If you don’t have this reference, look for a flat spot on the frame next to the flat tire.
You should see an exposed area that looks different from the rest of the frame. That’s where you’ll want to place the jack.
The jack needs to be on a flat and firm surface. You’ll need to lift the vehicle about six inches off the ground to remove the tire.
No one should ever put any part of their body under the truck while up on a jack. The risk of experiencing an injury is too significant.
7. Remove the Flat Tire
Once the truck is high enough, you can remove the lug nuts from the flat tire. Since you’ll need them for the replacement, it helps to keep them in a safe spot. The last thing you need is to have the parts wander into oncoming traffic.
Grip the tire by its treads, avoiding wires or sharp parts when removing it from the bolts. Use gentle pushes to keep it coming forward, being careful not to rock the truck.
Once you have it off, you can put on the full-size spare or the emergency donut.
8. Install the New Tire
When you have the old tire off, it’s time to put the new one on. Since you’ll be using an entire wheel, the unit should fit right on the bolts.
Get it on there so that the tire is secure. That’s when you’ll need to put the lug nuts back on. The best way to complete this step is to tighten them by hand as far as possible.
9. Lower the Vehicle and Tighten the Lugs
After you have the spare on relatively securely, you can lower the truck. The jack should get low enough that you can slide it out with minimal difficulty.
Once the vehicle is on the ground, use the lug wrench to tighten the nuts as much as possible. You should be turning them clockwise, pushing your entire body weight on the tool. That’s when you can replace the hub cap or wheel cover if you’re using a full-size replacement.
If you have a limited-distance spare, please remember to follow the speed indicators on the product to avoid a second blowout.
10. Stow Your Gear
Once you have the tire changed, it’s time to stow your gear. If you have a full-size spare, you’ll want to check the lug nuts for tightness after 25 and 50 miles to ensure that they stay on correctly.
You’ll also want to check the air pressure in your spare. The T-type designs require 60 PSI, which is often significantly more than what your regular tires require. If it needs more air, drive slowly to a service station to fix the issue.
From start to finish, it should take between 15 to 30 minutes to complete these ten steps.
Items That You’ll Want Packed to Change a Flat
It would be nice if every flat tire could get changed in perfect weather. Since that isn’t always possible, it helps to have a few extra items available in your S10 or Sonoma to facilitate the work.
Here are the best options to consider purchasing if you have some extra room for the equipment.
| Rain Poncho: | • You never know what the weather conditions will be like when your truck decides to have a flat. • When you can protect your clothing from rain, sleet, or snow, it’ll be easier to get through the steps to swap in the spare. |
| Work Gloves: | • Most tires use a radial design today. • That means a flat often exposes wires that can be surprisingly sharp! • Since it takes some force to remove the wheel sometimes, you’ll want a pair of thick leather work gloves to protect your hands. |
| Flashlight: | • When a flat tire happens at night, you can’t guarantee a street light will be somewhere close. • That’s why a bright emergency flashlight is a great investment to consider. • If you keep it in your S-10 or Sonoma full-time, you’ll always have a resource to use if something happens while on the road. |
| Working Batteries: | • Don’t assume that your current batteries have enough life in them to help you change a flat. • It always helps to keep at least one spare set in the vehicle to ensure that you can work safely. • If you want to limit your risks even more, consider having a second extra set to manage an extended emergency. |
| Wheel Wedges: | • Wheel wedges limit the vehicular movement that occurs when trying to break a lug nut’s resistance. • A set of two is usually enough to manage the situation, which means you can get right to work without trying to find rocks to use as chocks. |
The one item that often gets overlooked when changing a flat tire is a small 2×6-inch wooden plank. This board helps to secure the jack when it is time to lift the truck.
Since space is often limited with the Chevy S-10 and Sonoma, I highly recommend investing in a fitted toolbox for your bed. You’ll get the space needed for the tools without losing much of your hauling capacity.
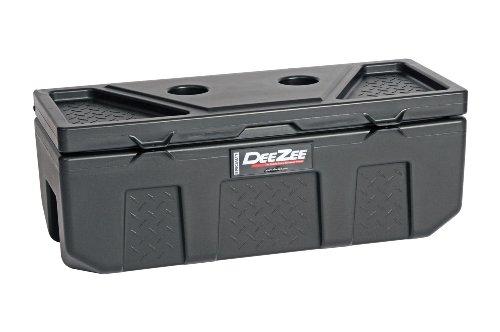
I love using the Dee Zee 6535P Utility Chest Toolbox for this purpose. Since it is made from poly instead of metal, you don’t need to worry about rust, damage, or scratches. It sits securely in the bed, protecting your tools with a double-wall lid.
If you’re tailgating, you can use the molded cup holders while chatting with friends, watching fireworks, or waiting for the big game.
You can also pull it out of your S-10 or Sonoma with ease for additional tool storage in any barn, garage, or trailer.
A Final Thought About the Lug Pattern for S-10s and Sonomas
I know it can be fun to experiment with different looks and styles, but I’ve always found that OEM or specific aftermarket parts work better with Chevy trucks. You can use adapters or make things fit, but the performance often declines when making those modifications.
The lug pattern is the same as Chevy’s sports car lineup, which helps when you want to spruce up the look of your truck. You’ll need to avoid items that use the metric system since the 5 x 120s are 0.7mm off, but that’s the only significant difficulty.
As for dealing with a flat with your Chevy S-10 or Sonoma, the best thing you can do is to keep your tires inflated at the correct PSI. Try to rotate them according to the automaker’s guidelines and inspect the tread monthly for signs of premature wear.
There’s never a good time for a flat. When you know how to change it with a spare with the correct lug pattern, you won’t lose much time on your trip since you can do the job yourself instead of waiting for roadside assistance.
