
What is a dash cam?
It is a video camera that gets mounted on the windshield or dashboard of a vehicle. It’s typically used to continuously record your view of traffic, the road, or whatever else is in front of your car, truck, van, or SUV.
These dashboard cameras take up a little space, but they can also be an invaluable resource for protecting yourself when driving.
If you get accused of a hit-and-run, being at-fault in an accident, or need protection while working as a rideshare provider, a dash cam is an investment that makes a lot of sense.
When you know how to install one yourself at the fuse box, you’ll save a bundle on labor while protecting your vehicle’s integrity.
Hardwire Dash Cam Fuse Recommendations
The best way to install a dash cam on a vehicle is to hardwire it straight to the fuse box. That makes it so that the equipment turns on when you start the ignition, but it turns off when everything shuts down. That technique offers parking-mode records and streams for items with that feature.
If you order a dash cam that doesn’t come with hardwiring equipment or instructions, you can purchase kits that take care of the hardware selection. It’s a super simple way to get the recording you want while adding to the safety of the overall driving experience.
It gives you 24/7 protection for your vehicle while preventing battery discharge. If you have an always-on 12V socket, which is common for most passenger vehicles, this installation method is the best one to use.
When you have an older vehicle or one with a smaller energy resource, it’s better to use a battery-based installation instead of the hardwiring methodology.
How to Hardwire a Dash Cam
The first step to consider when installing a dash cam is to find an appropriate hardwire kit that will work for your vehicle’s needs.

What you decide to use will depend on your camera. If you have a Thinkware Dash Cam, you might need a specific hardwire installation that works with your equipment. You’d plug the fuse directly into the box while having the OEM connectors attach to your camera at the particular points indicated by the manufacturer.
A universal hardwiring and fuse kit will get the job done when installing a dash cam for almost everyone else.
Several highly-rated options are available to consider. Since all of them provide the same essentials and use similar materials to create the gear, any of the following are suitable for your dash cam installation.
- ROVE Ultimate Dash Cam Hardware Kit
- Nextbase Series 2 Dash Cam Kit
- Garmin Dash Cam Hardware Kit
- Plozoe Dash Cam Hardwire Kit
When you select a hardwire kit for your dash cam installation, you’ll want to choose an option with the most compatibility possible if you need a universal product.
That means you’ll want input options of 12V to 24V, output options of 5V/2A, and mini-USB dash cam compatibility.
Once you’ve selected the dash cam and hardwire kit to install, you’ll be ready to follow these additional steps.
1. Locate your vehicle’s fuse box.
Your owner’s manual indicates the fuse box’s location. If you don’t have this documentation, it is sometimes available online through your dealership or automaker.
Some vehicles might need you to remove some of the trim or open panels to access the fuse box.
It’s also available near the battery in a box you flip open for some cars, while others have them inside underneath the steering wheel.
If you need to pry open some trim to access your fuses, a removal tool or kit can help you accomplish this task while reducing damage risks.
2. Find the correct fuse slot to use.
Once you locate the fuse box, it is necessary to find the correct slot to use for hardwiring your dash cam. You’ll want to use one rated between 10 to 30 amps to ensure your equipment has enough power.
Your owner’s manual will let you know what fuses to avoid because of the safety features installed on your vehicle.
You don’t want to use fuses that deal with your horn, ABS, stability programs, airbags, and similar features.
The fuses that open a sunroof or operate the radio are typically safe, but you must reference the documentation from your automaker to ensure you’re using the correct setup.
Almost all hardwire kits have three wires that require a connection.
- There is the wire that goes to a constant fuse.
- Another one routes to an ignition-based fuse.
- Finally, you have a wire that gets connected to the metal ground bolt.
Some kits only contain two wires. You’ll always have one that goes to the ground bolt.
You can use a circuit tester to determine what fuse in the box is the constant one. It will always have power available, even when the vehicle isn’t operating. After you’ve identified this resource, you’ll follow the instructions that come with your hardwiring kit to continue the installation process.
3. Clean up the wires.
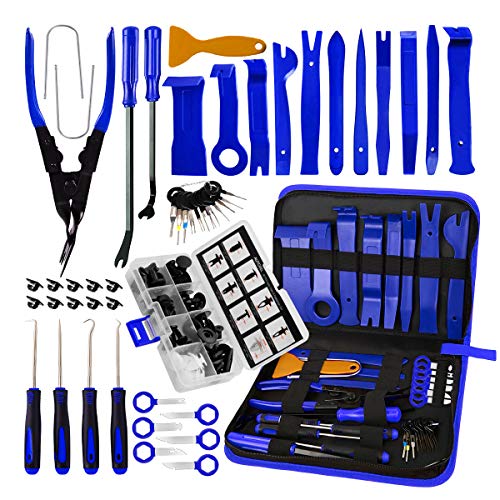
It might be necessary to add a fuse for a more professional installation for your dash cam. A product like the Hilitchi 125-piece circuit set allows you to create a custom result that supports your vehicular and camera needs.

Crimp the fuse kit with a standard needle nose plier when adding a fuse to ensure you have an appropriate connection. Several variations exist, which is why a kit is usually the best investment.
If you don’t want to clean up the wires, try wrapping them around the fuse’s legs. It will need a few layers to ensure the connection remains secure and tight.
4. Ground the hardwire kit for your dash cam.
Once you’ve connected the elements of your hardwire kit, it is time to connect the ground. It’s usually the wire with a ring or a C-style connected at the end. You’ll add this item to one of the screws next to the fuse box.
You might need a socket set to loosen the bolt or nut. Most vehicles use a 10mm or 12mm size today, although some automakers have transitioned to Torx or hex-style Allen wrench bolts.
The ground must be tightened correctly. Loose connections can cause power issues to your dash cam that could result in damage.
You must be careful about affixing the fuse kit grounding wire to a plastic anchor around the metal bolt. It must be paired to unpainted bare metal for it to work appropriately.
When the current sent to the electronics is unstable, you’ll get frequent hard resets.
You’ll want to look for the factory ground when installing the fuses and grounding wire to ensure that the best result occurs.
5. Test your dash cam.
Once you have everything hooked up and ready to go, it helps to plug in the kit to see if your connections work as intended.
If everything works as it should after starting your vehicle, you can tuck the wires into the fuse box and close things up. Any excess wiring can get zip-tied and secured to keep it out of the way.
You don’t want to have fuse box access blocked by the installation.
Should you encounter some problems, you can fix them during this step before everything gets closed up to make life a little easier.
Once you’ve completed this step, you should have an operational dash cam!
Pros and Cons of Using a Dash Cam
After you successfully install a dash cam using the above hardwire recommendations, you’ll notice that a few pros and cons occur as part of this investment.
| List of the Pros of Using a Dash Cam | List of the Cons of Using a Dash Cam |
| • Dash cameras give you supporting evidence that can be used if you’re in an accident or witness one while driving. They can see the road ahead and serve as parking assistance. • Many insurance providers offer discounts on your required premiums because you are using proactive preventive equipment while behind the wheel. • It encourages safer driving from others because people know that any wrongdoing gets captured on the recorded stream. | • If a dash cam isn’t correctly mounted, it can be a visual distraction to the driver. Larger models even create blind spots that could be problematic in some situations. • It can lead to a higher risk of theft. Since the technology is usually in plain sight, it isn’t unheard of to have people break through windows or pick locks to access the equipment. • When using a streaming camera while driving, there is always a risk that you could invade someone’s privacy. |
The good news is that most dash cams give you the option to lock footage so that it doesn’t get deleted or overwritten. When you need to save a file because of what got captured, this tool allows the information to get distributed to the proper authorities.
Some dash cams upload to a cloud-based service using cellular signals to ensure that you don’t lose your footage. You also have the option to have large-capacity memory cards to store files locally for even more convenience.
One of the best cost-effective options for file storage and transfer is Wi-Fi capabilities with hardwired dash cams. This feature lets you transfer footage from the camera to your mobile device.
A Final Thought on Fuse Recommendations for Dash Cams
Although individual fuses are available for some dash cams, it’s usually easier to purchase an installation kit. You never know what problems might come up during this process, which means you can save a lot of time and frustration by having everything you need before beginning.
I’ve found several mistakes that can happen when you’re hardwiring a dash cam to your fuse box.
- Reversed orientation of the ignition and accessory switches is easy enough to do if you don’t test for the constant power.
- A bad ground won’t deliver resources to the dash cam.
- Adding a fuse incorrectly won’t let the wiring access the power that the equipment needs.
- Blown fuses can happen when they get overloaded with an improper connection.
- Loose wires can cause unpredictable currents and hard resets.
If you take the time to install the fuse correctly, I’ve found that the rest of the work is typically smooth sailing. Once everything gets connected, you’ll be ready to enjoy the benefits that come with this investment!
